

How to Measure for a uPVC Door: A Step-by-Step Guide
Introduction on measuring a uPVC Door
Picture this: you’ve just chosen a brand-new uPVC door. The style is spot on, the colour complements your brickwork beautifully, and you can already imagine the extra warmth it’ll bring to your hallway. But when the door arrives, it doesn’t fit—too wide by a few millimetres, or not quite tall enough to cover the frame. The excitement of upgrading your home suddenly turns into frustration, wasted money, and unnecessary hassle.
This scenario is far more common than you might think. At Doorland, we’ve helped countless homeowners and tradespeople who started with good intentions but hit a snag at the very first step: measuring up. Getting the measurements wrong is like trying to hang a picture without checking if it’s straight—you might not notice at first, but the misfit will nag you every single day.
That’s why this guide exists on How to Measure for a uPVC Door. Whether you’re a DIY enthusiast taking on your first door replacement or a seasoned tradesperson who knows the value of precision, we’ll walk you through the process of measuring a uPVC door properly. By the end, you’ll be able to measure with confidence, avoid costly mistakes, and ensure your new door fits as securely and snugly as it should.
Why Accurate Measurements Matter
Measuring for a uPVC door isn’t just about numbers on a tape measure—it’s about laying the groundwork for a warmer, safer, and more stylish home. Think of it like tailoring a suit. You wouldn’t expect an off-the-peg jacket to sit perfectly unless it’s cut to your exact size. The same goes for your door: the closer the fit, the better the performance.
Here are three key reasons why accuracy matters:
- Energy Efficiency & Draught Prevention
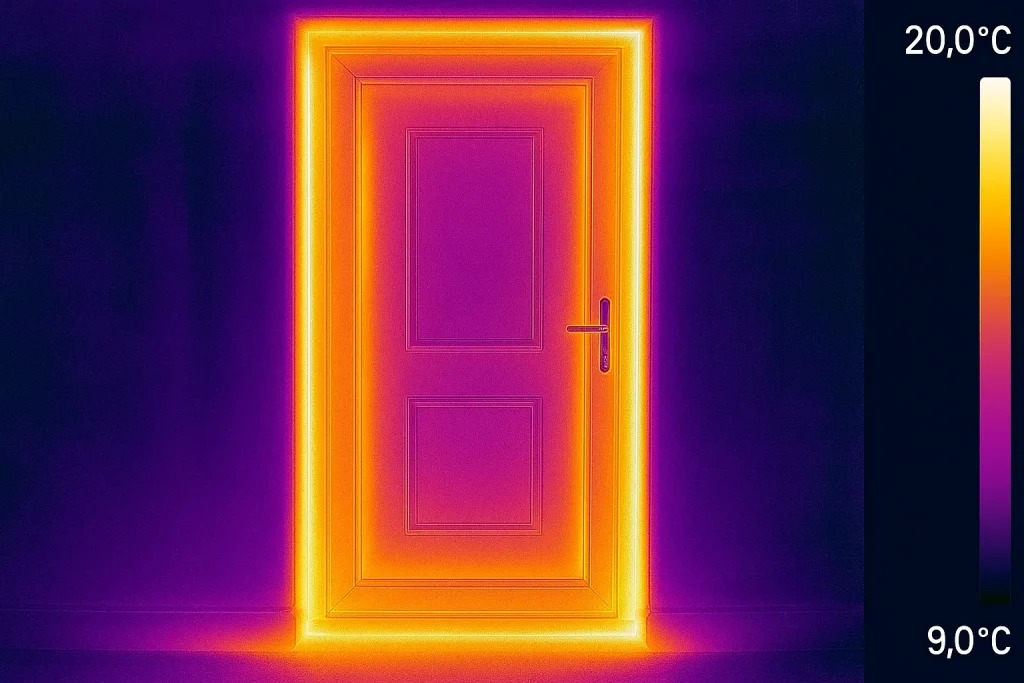
This is the importance of how to measure for a uPVC door. A poorly measured door can leave small gaps that act like open invitations for cold air to sneak in. Imagine sitting in your lounge with a blanket, wondering why the heating never seems to make the room cosy. Even the smallest draught can make a noticeable difference to your energy bills. According to the Energy Saving Trust, around 15–20% of heat in homes is lost through poorly fitted doors and windows [Source: Energy Saving Trust]. By ensuring your measurements are precise, you’re not just fitting a door—you’re sealing in comfort and savings.
- Security & Peace of Mind
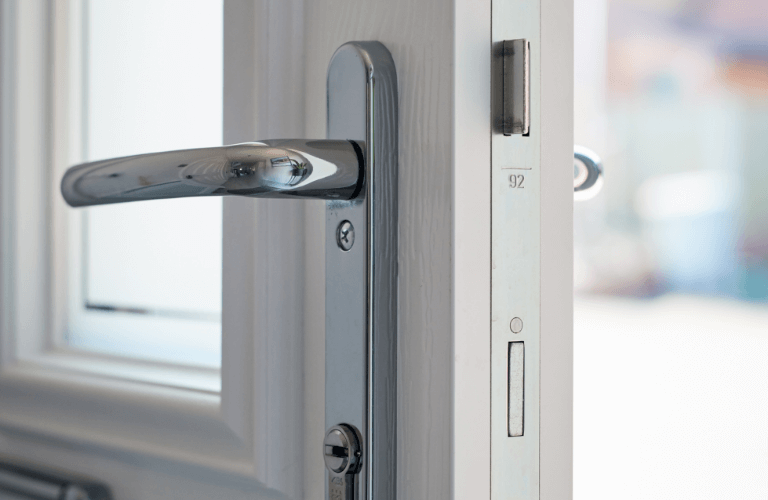
Doors are more than just entry points; they’re your home’s first line of defence. A misfitting uPVC door may not align properly with the locking system, leaving weak spots that could compromise your security. Think of it as locking your car but leaving the windows open—technically secure, but practically vulnerable. Proper measurements ensure your multi-point locking system engages fully, keeping your home as secure as it was designed to be.
- Avoiding Costly Installation Errors on how to measure for a uPVC door
It’s not unusual for people to assume that a “close enough” measurement will do. Unfortunately, even being out by just a few millimetres can mean the difference between a smooth installation and a return delivery. This isn’t just inconvenient—it’s expensive. From paying for delivery twice, to re-ordering a door, to the time lost in waiting, mistakes here can easily double your costs. Correct measurements remove all of that risk, giving you a stress-free installation process from start to finish.
At Doorland, we’ve seen how a properly measured door not only fits beautifully but transforms the feel of a home. It’s that combination of comfort, security, and style that makes accuracy non-negotiable.

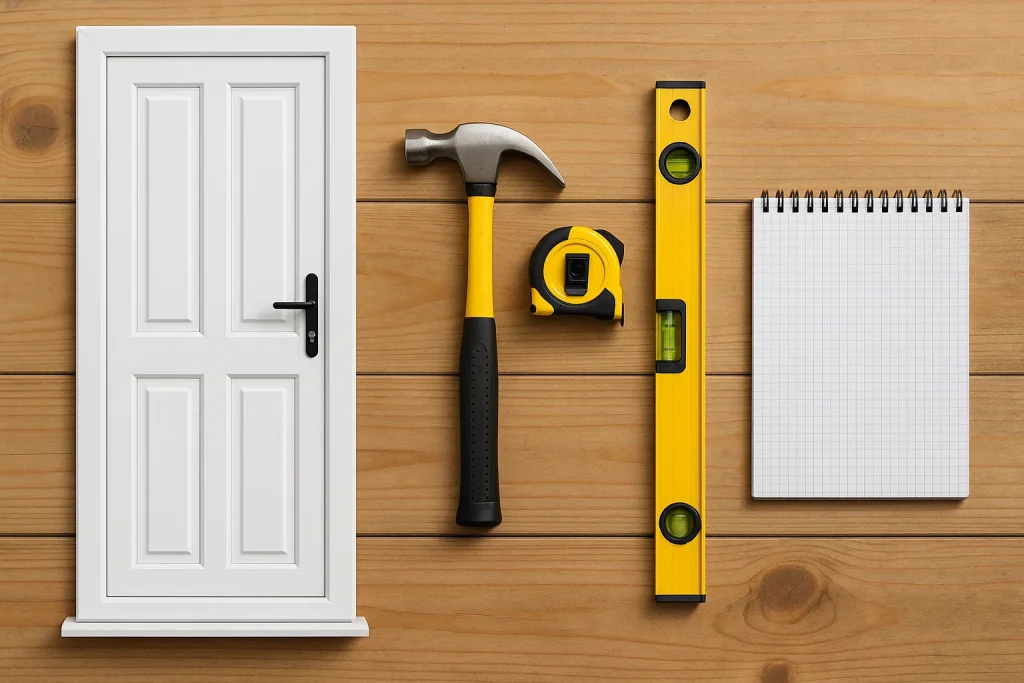
Tools You’ll Need Before Measuring
Before you even reach for the tape measure, it’s worth setting yourself up with the right tools. Think of this stage as packing for a journey — you wouldn’t head out on a long walk without the right shoes, and you shouldn’t attempt measuring a uPVC door without the essentials. With the right kit in hand, the process becomes quicker, easier, and far more accurate.
Here’s what you’ll need:
- Tape Measure
The most obvious tool, but also the most important. A reliable, easy-to-read tape measure is non-negotiable. We recommend a steel retractable tape as it gives the rigidity you need for measuring larger spans without sagging. - Spirit Level
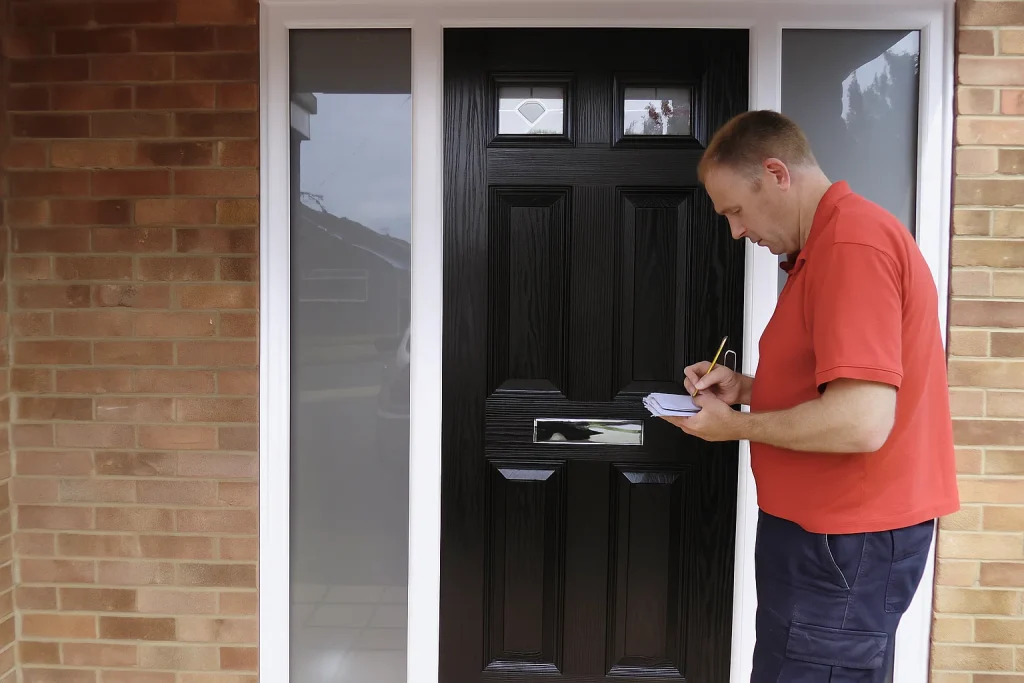
Think of this as your “truth detector.” A spirit level confirms whether your door frame is straight and square. Even small tilts in an existing frame can affect the accuracy of your measurements and the fitting of the new door. - Pencil & Notepad
It sounds basic, but jotting measurements down immediately avoids costly slip-ups. Many installers also recommend recording three measurements for each dimension (top, middle, bottom for width, for example) so you can quickly see any discrepancies. - Safety Equipment
Gloves protect your hands from splinters and sharp edges, especially when dealing with older frames. A step ladder may be useful for taller doors or awkward angles. Remember: safety first — there’s no point in saving a few minutes if it risks injury.
Pro Tip from the Experts at Doorland:
Always measure twice, and then measure again. Repetition isn’t overkill when you’re dealing with something as precise as a door frame. Just as a tailor double-checks every seam before cutting fabric, taking a few extra moments now can save hours later.
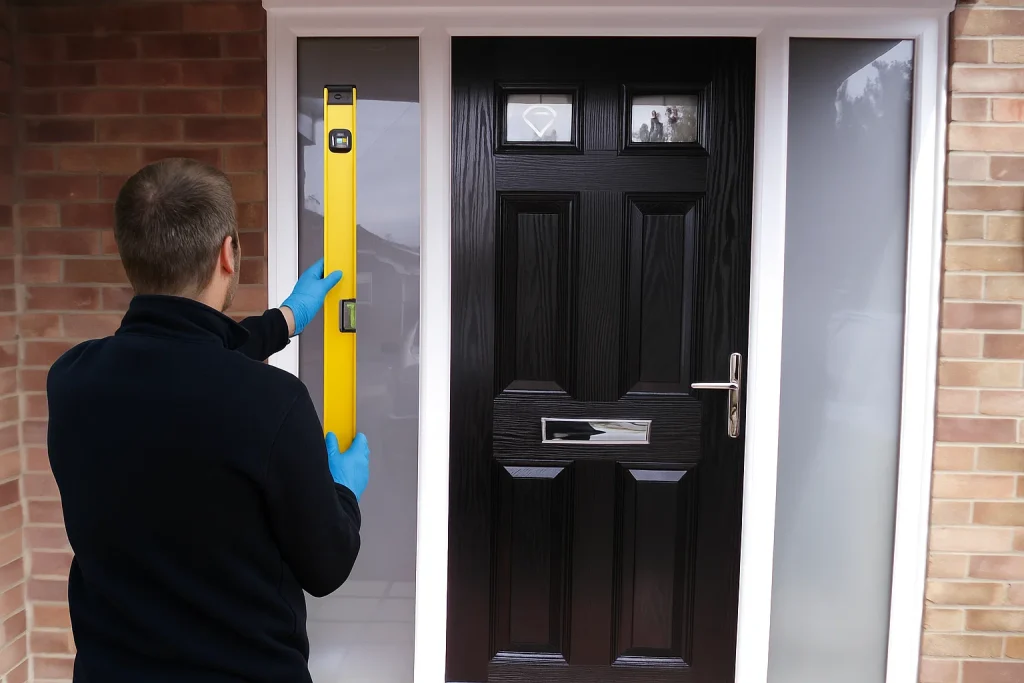
Why the spirit level matters: frames in the UK are commonly built around 70 mm uPVC profiles, but even a small lean or twist in the opening can throw off clearances; checking level and plumb prevents ordering errors.
Step-by-Step Guide to Measuring Your uPVC Door
Getting the right measurements isn’t complicated, but it does require care. Think of it like baking — if you get the ingredients wrong by even a small amount, the cake won’t rise. Doors are the same. A few millimetres off can mean draughts, sticking hinges, or even a door that simply won’t fit. Here’s how to measure for a uPVC door and to measure correctly, step by step.
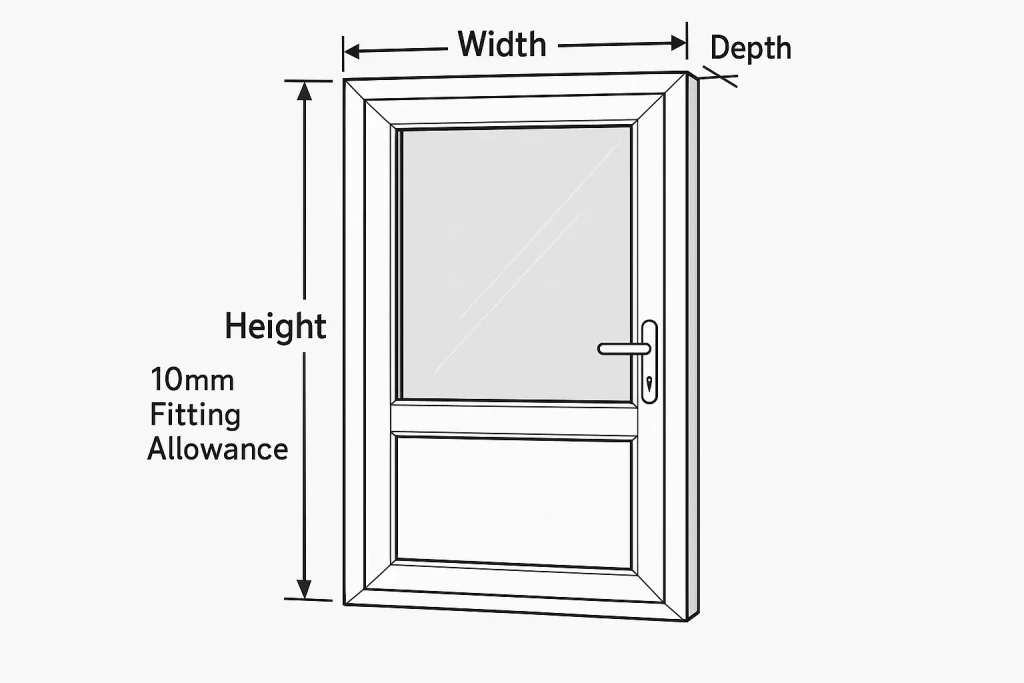
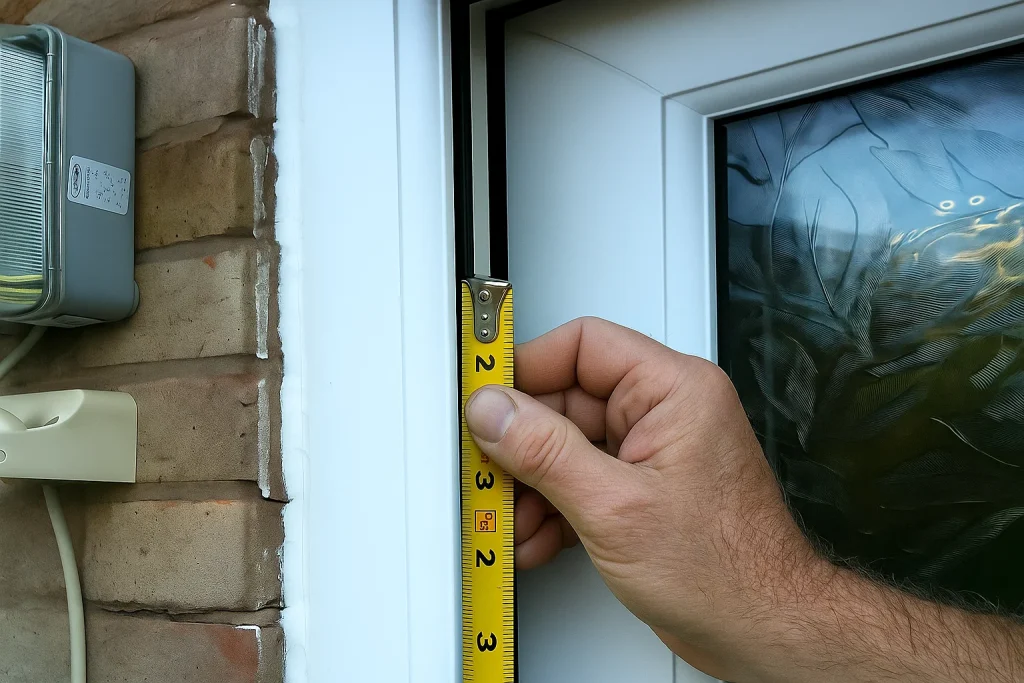
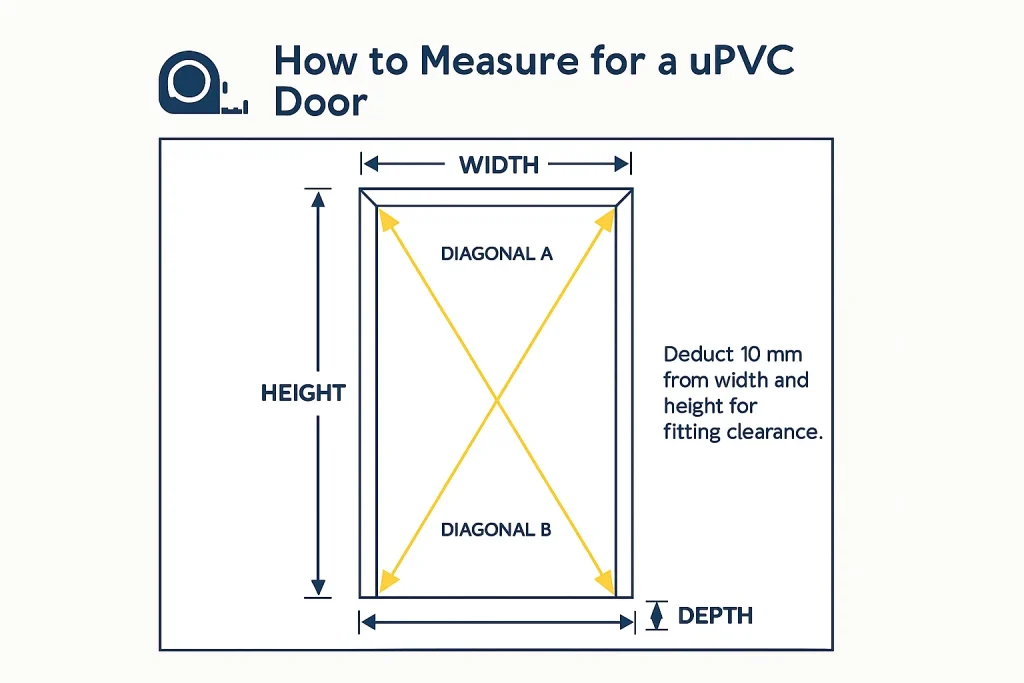
Step 1: Measure the Width
Start by measuring the width of the door opening. Take three measurements:
- Across the top of the frame
- Across the middle of the frame
- Across the bottom of the frame
Always use the smallest measurement as your final width. This ensures the door will fit even if the frame is slightly uneven — which is common in older properties.
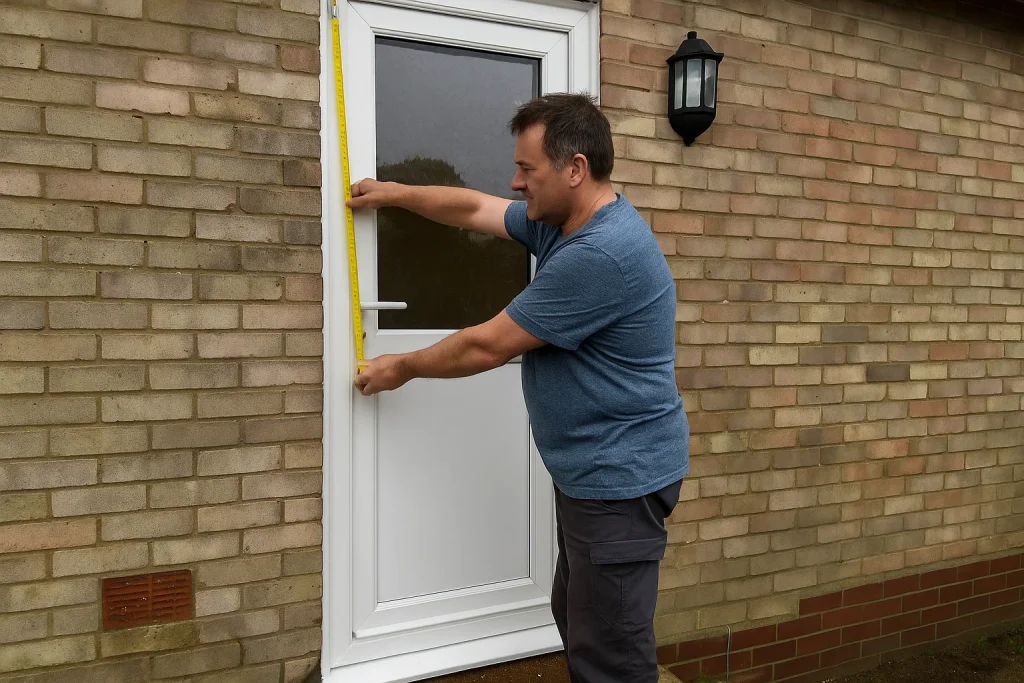
Step 2: Measure the Height
Next, measure the height of the opening:
- Left-hand side
- Centre
- Right-hand side
Again, note the smallest figure. This how to measure for a uPVC door avoids ordering a door that’s too tall, which could damage the frame or flooring.
Step 2a: Check the Diagonals for Squareness
Once you’ve recorded the width and height, it’s time to confirm your opening is square. Measure both diagonals of the frame — from top-left to bottom-right and from top-right to bottom-left. This is crucial for how to measure for a uPVC Door.
-
If the difference between the two diagonal measurements is 5 mm or less, your opening is considered square and suitable for a straightforward uPVC door installation.
-
If the difference is greater than 5 mm, the frame may be twisted or out of square. In this case, speak to a professional installer before ordering, as the opening may need adjustment or shimming during installation.
Why this matters: A frame that isn’t square can cause problems with hinges, lock alignment, and airtightness. Think of it like trying to hang a picture on a slanted wall — no matter how straight the frame is, it won’t sit right.
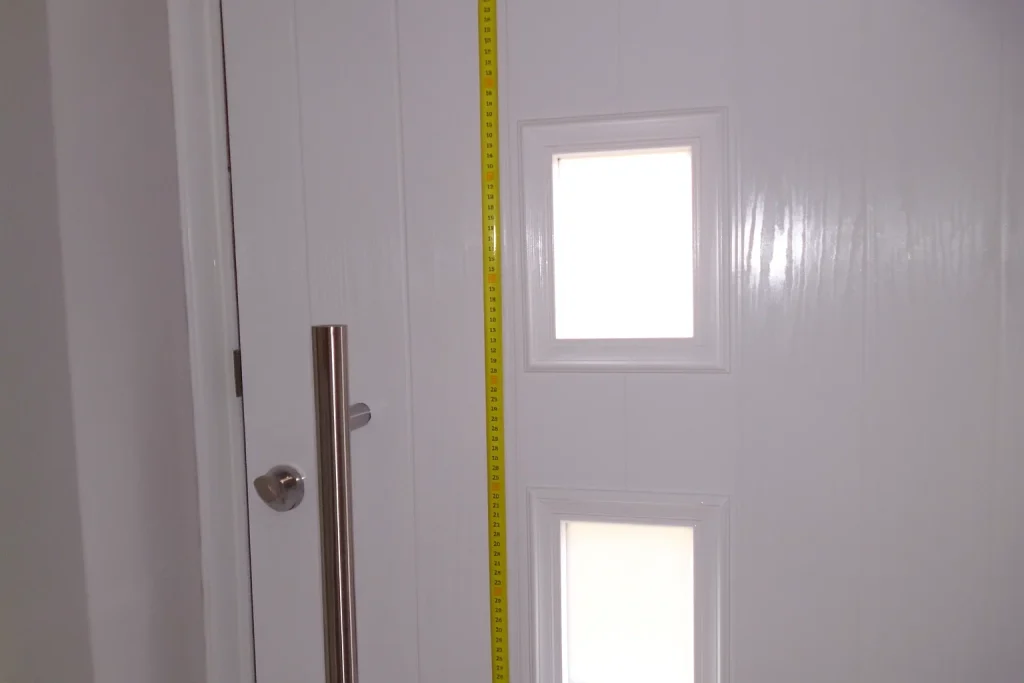
Step 3: Measure the Depth
Check the thickness of the frame. Most standard uPVC door frames are around 70mm, but older homes or bespoke frames may differ. This measurement is often overlooked, but it plays a big part in ensuring your new door sits flush and functions properly.
Most modern UK uPVC door systems use ~70 mm frames, but older properties or bespoke systems may differ — measure to confirm.
Step 4: Account for Fitting Allowances
Once you’ve taken width, height, and depth, it’s time to allow for fitting clearance. Subtract 10mm from both the height and the width. This ensures there’s enough space for the door to be fitted without forcing or damaging the frame.
Common Mistakes to Avoid When Measuring
Even with the best intentions, measuring mistakes are surprisingly common. We’ve seen it all at Doorland — from doors ordered several centimetres too wide, to customers forgetting to account for tiles or skirting boards. The good news? These mistakes are easy to avoid if you know what to look out for.
Here are some of the most common pitfalls:
1. Only Taking One Measurement
It might be tempting to measure once across the width and once for the height, but this is where things often go wrong. Frames are rarely perfectly square, especially in older houses. If you only measure once, you could miss those small discrepancies that cause big fitting issues later.
2. Forgetting to Check Frame Depth
Frame depth often gets overlooked. Customers sometimes focus only on height and width, only to find their new uPVC door doesn’t sit properly within the existing frame. This small oversight can lead to drafts, misaligned locks, and wasted money.
Draught-proofing gaps around doors and windows saves ~£85/£95 per year, so preventing gaps with accurate measuring is worthwhile.
3. Not Allowing for Plaster, Skirting, or Tiles
When measuring, it’s easy to forget what surrounds the frame. Skirting boards, plaster edges, or even a tiled step can all reduce the usable opening. Failing to account for these can result in a door that technically fits the frame but clashes with the surroundings. It’s like buying a sofa that technically fits the wall but forgets about the radiator — suddenly, it’s no good. Small obstructions often create the very gaps that undermine both Part L thermal performance and day-to-day comfort.
4. Rounding Up Measurements
Precision is everything. Some people round their measurements up or down, assuming a few millimetres won’t matter. Unfortunately, they do. Always work with the exact figures you take, and remember to subtract your 10mm fitting clearance. By avoiding these common errors, you set yourself up for a smoother installation, better energy efficiency, and a door that looks and feels exactly right.
When to Seek Professional Help
Measuring for a uPVC door is usually straightforward, but not every home presents a textbook case. Some properties — especially older homes or those with custom-built openings — can throw up challenges that make accurate measuring tricky. In these situations, professional help isn’t just recommended, it’s essential.
Here are some signs you should call in the experts:
1. Complex Openings (Arched or Non-Standard)
If your home has an arched doorway or a frame that doesn’t match standard sizes, it can be extremely difficult to get the measurements right. A miscalculation here could leave you with a door that doesn’t even come close to fitting. It’s a bit like baking without a recipe — you might get lucky, but chances are the result won’t be what you hoped for. Professional installers know how to measure for a uPVC door and how to handle unusual shapes and sizes with total precision.
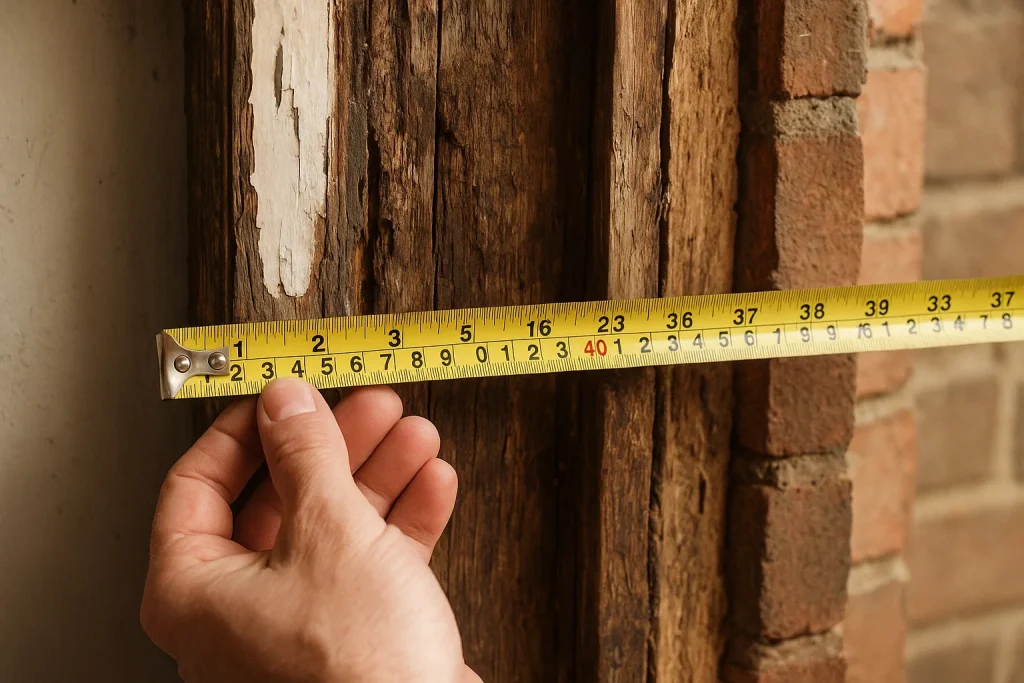
2. Replacing Doors in Older Homes
Older properties often have frames that have shifted over time due to settling or renovations. These frames may be uneven or warped, making standard measuring techniques less reliable. A professional eye ensures that any hidden issues are spotted before you order a new door.
3. Peace of Mind and Expert Advice
Even in standard cases, many customers prefer to lean on professional expertise for reassurance. By choosing a supplier like Doorland, you don’t just get a product — you get access to seasoned tradespeople who understand UK regulations, security standards, and energy performance requirements.
With expert help, you don’t just ensure accurate measurements — you gain the confidence that your new door will meet the highest standards of security, durability, and style.
If you’re unsure whether your opening meets current Part L expectations (U-values/airtightness) or you need PAS 24 security performance, a professional survey ensures the door can truly achieve its rating once installed.
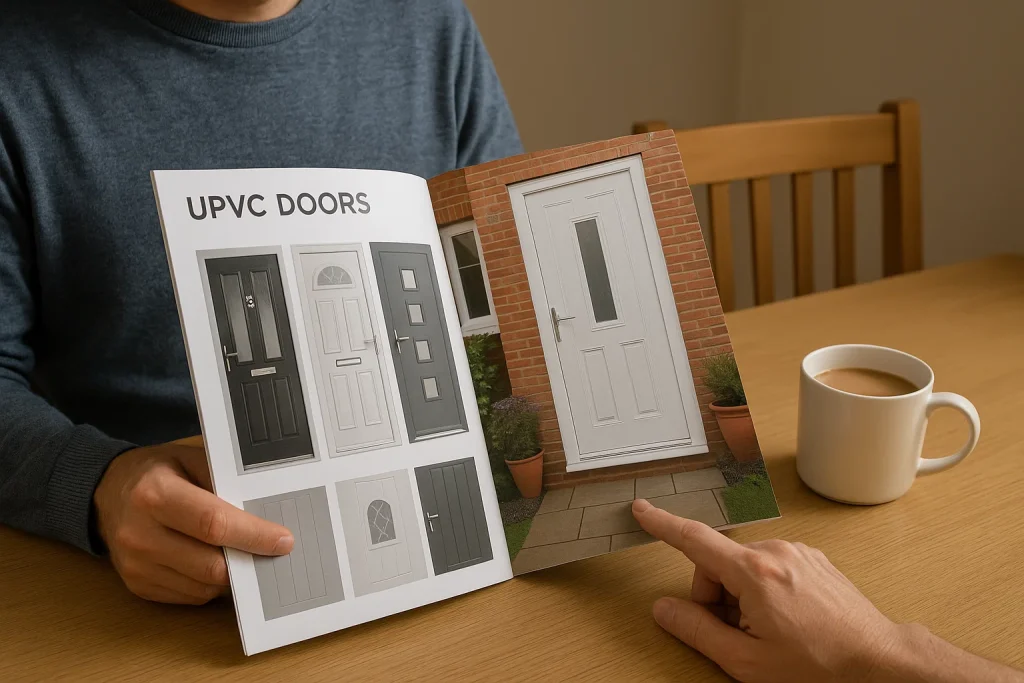
Ordering Your New uPVC Door with Confidence
Once you’ve taken accurate measurements, the next step is choosing and ordering your new uPVC door. For many people, this can feel like the daunting part — but it doesn’t have to be. At Doorland, we’ve simplified the process so you can order online with total confidence, knowing your measurements will translate into a perfect fit.
Here’s how to measure for a uPVC door and how we make the difference:
1. Expert Guidance at Every Step
Unlike faceless online retailers, Doorland is run by tradespeople with years of experience. Whether you’re a DIY homeowner or a professional installer, our team is on hand to guide you through the process, answering questions and offering advice tailored to your property. Remember, you can also ring us for free on 0800 099 1919 7 days a week.
Ask for documented U-values and PAS 24 evidence (2022 edition) alongside your specification; these are the benchmarks widely referenced for energy and security in the UK.

2. Supply-Only Service for Flexibility
Many of our customers are skilled tradespeople who simply want high-quality doors delivered on time. That’s why Doorland offers a trusted supply-only service. You measure, you order, and we deliver — with no pushy salespeople and no unnecessary extras.
3. Quality That Speaks for Itself
Every uPVC and composite door we supply is tested to meet UK standards for energy efficiency and security. With multi-point locking systems, toughened glass options, and robust frame construction, you’re not just ordering a door — you’re investing in long-lasting peace of mind.
With accurate measurements and Doorland’s expert service, you can order your new door with complete confidence — whether you’re tackling the job yourself or working with a tradesperson.
Conclusion: Measure with Care, Order with Confidence
Measuring for a uPVC door might feel like a small detail in the bigger picture of home improvement, but as we’ve seen, it makes all the difference. A few millimetres can separate a door that fits perfectly — keeping your home warm, secure, and stylish — from one that causes endless frustration.
By following the step-by-step process, avoiding common mistakes, and using the right tools, you can measure with confidence and take control of your project. But you don’t have to go it alone. Whether you’re fitting the door yourself or working with a tradesperson, Doorland is here to provide the support, products, and expertise you need.
With our supply-only service, expert guidance, and a reputation built on years of trusted service, we make ordering your new uPVC or composite door straightforward and stress-free. From accurate measurements to final installation, you’ll have peace of mind knowing you’ve got the right fit — in every sense.
So, when you’re ready to take the next step:
- Browse our full range of uPVC Doors
- Explore our Composite Doors for added security and style
- Or simply get in touch with our team for tailored advice
At Doorland knowing how to measure for a uPVC door is crucial. We believe every door should open smoothly, close securely, and welcome you home in style. Start your journey today — and measure up with confidence.
By Doorland Editorial Team — Reviewed by Senior Installer, Oct 2025
FAQ: Measuring for a uPVC Door
How do I measure for a uPVC door correctly?
To measure for a uPVC door, start by measuring the width (top, middle, bottom), then the height (left, centre, right), and use the smallest figures. Always measure in millimetres, check the frame depth (typically 70mm), and remember to deduct 10mm from width and height for fitting clearance.
What tools do I need when learning how to measure for a uPVC door?
You’ll need a steel tape measure, a spirit level, a pencil, and a notepad. Gloves and a step ladder may also help if you’re working on older frames.
Can I measure for a uPVC door without removing the old frame?
Yes — you usually measure with the existing frame in place. Just ensure you take three measurements for both height and width and note the smallest measurement.
How accurate should I be when measuring for a uPVC door?
Your measurements should be precise to the millimetre. Even a 3–5mm error can cause fitting problems, so double-check before ordering.
Do I need to allow clearance when measuring for a uPVC door?
Yes. After taking your measurements, deduct 10mm from both height and width. This allowance ensures the door can be fitted without forcing it into place.
What’s the standard depth when measuring for a uPVC door frame?
Most modern uPVC door frames measure around 70mm in depth, but older or bespoke frames can vary, so it’s always best to confirm.
How do I measure for a uPVC back door compared to a front door?
The process is the same. The only difference is that back doors often have tiled steps or skirting to consider when measuring.
What if I get my uPVC door measurements wrong?
If the measurements are wrong, your new door may not fit, and re-ordering can be costly. If in doubt, seek expert advice before placing your order.
Where can I get professional advice on how to measure for a uPVC door?
If you’re unsure, Doorland’s expert team can guide you. We specialise in helping homeowners and tradespeople measure correctly and supply the right uPVC Doors and Composite Doors to fit your home perfectly.
Can I install a new uPVC door myself after measuring?
Yes — confident DIYers can install their own doors. However, if your frame is uneven or you’re working with an older property, professional help ensures a better fit and long-term performance.
Your Title Goes Here
Your content goes here. Edit or remove this text inline or in the module Content settings. You can also style every aspect of this content in the module Design settings and even apply custom CSS to this text in the module Advanced settings.